How to
install MySQL on Windows 10.
In this post, we will learn how to How to Install Mysql on Windows
10. The same procedure can be used for installing MySQL on Windows 8/
Windows 7. But first, let’s see What is MySQL.
MySQL is a
very popular, Open Source Database. Officially pronounced as “my Ess Que Ell” (not
my sequel).
Handles very
large database; very fast performance. Why are using MySQL? Free(much cheaper
than Oracle!) Each student can install MySQL locally. Easy to use Shell for
creating tables, etc.
Easy to use
with JDBC. While installing MySQL, it will prompt you to create a root password.
At this stage please select a safe and secure password.
Make sure you remember the password, to use it
later. MySQL Tutorial for beginners and professionals with examples on CRUD,
insert statement, select statement, Update Statement, Delete Statement, use database,
keys, joins etc.
Let’s Start….
Step1:
Type Download MySQL in your browser.

Step2:
Select the Operating System whichever you are using then You will see go to Download Page button like shown in the below image.

Now you will see two windows installer here,
First windows Installer which containing 24.5MB megabytes. This will require an internet connection to install MySQL.
Second Windows Installer which containing 427.6MB. This will not require an internet connection to install this installer.

Step3:
After selecting any of Windows Installer you will be redirected to Downloads page as shown below in the image, then click on No thanks, just start my download.

Step4:
Then downloading will start, then double click on the MySQL installer.

Windows Installer will Prepare to install MySQL.


Step5:
After finding all packages below shown image window will appear saying Choosing a Setup Type. You need to select which setup you want to install MySQL.
Default selected will be Developer Default option, Accordingly will see the description of each Setup. I am choosing the default option here.

Step6:
If you didn't get the license agreement page, don't need to worry, you can go ahead continue installing the next step.
I got this Path Conflicts because earlier I have already installed, You can choose your default path.
Path Conflicts

Step7:
You will get Pop up saying one or more product requirements have not been satisfied. You need not to worry about it, click yes and go ahead.
Check Requirements:

Step8:
You will see All MySQL products which need to download on clicking on Execute button. It will start downloading each product, You can see Downloaded in Status as shown in the below image.
Installation and click on Execute:

Step9:
After the successful installation of each Product, You will see the Product Configuration window.
Product Configuration:

Step10:
It will check the Availability of MySQL. The default selected will be Standalone MySQL Server/Classic MySQL Replication. And you want Cluster kind of DB then choose that. I am continuing with default selected i.e first as shown in the below image.
Click on Next then: High Availability:

Step11:
Next will be Server Configuration type, In Config Type you can select Machine type, which is Developement Machine, Server Machine, and Dedicated Machine. Each will be varying some memory usage. Port is showing default Port:3306. You don't need to change, as there is no good reason to change the port. I chose default selected option. Development Computer You can go with the same as this is less memory usage and can do practice, Then click next.
Click on Next: Type and Networking:

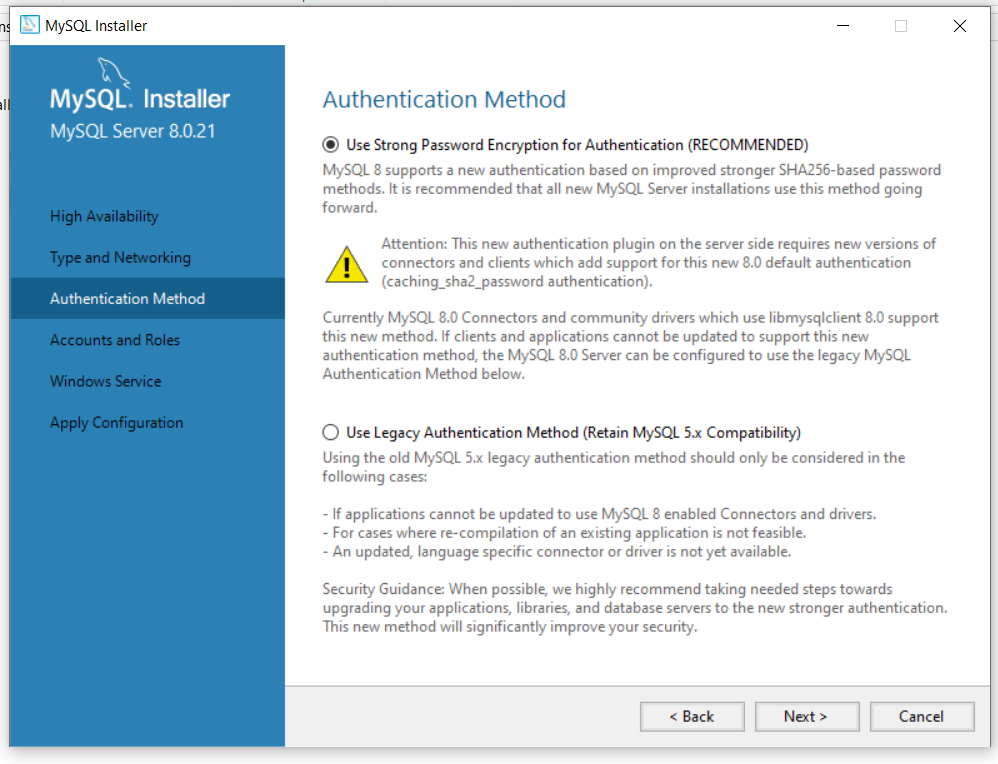
Step12:
Authentication Method says default selected Use Strong Password Encryption for Authentication which is Recommended. Then click on the Next button to set the password for root account.
Step12:
Here it will ask to enter the Root account password, I have entered root as password and then click on check. Then click on the Next button for installer windows service.

Step13:
Now You will see Windows Service here, I will leave the default selected, Windows Service Name MySQL80 is coming from the MySQL version, currently, we are using 8.0.21 that's why it is showing MYSQL80. There is custom User selection also that is for an existing user account which is for advanced scenarios.

Step14:
Now you will see the configuration steps here, Click on Execute Button, it will execute all the steps. As shown in the below image you see steps have been completed.
Writing Configuration file
Updating Windows Firewall rules
Adjusting Windows Service
Starting the Service: When you will start the MySQL client, you will be directly able to connect to MySQL server.
Uploading the Start Menu link
Then click on finish.

Step15:
Now you will see MySQL Server 8.0.21 configuration is completed as shown in the below image.

Step16:
After the Product configuration MySQL Server 8.0.21 complete and MySQL Router 8.0.21, Samples and Examples configuration need to be complete as shown in step15. It will show that both the configuration is complete or not for MySQL Router and Sample, Examples.
After that MySQL Router Configuration will also get installed click on finish.

Step17:
After Router configuration completed, sample and Examples will also complete then enter the password of the root account, I have entered here root as password and then click on the check button, after Checked successfully then click on the next.

After clicking on the check button you will see the Connection succeeded. Then click on the Next button.

Step18:
Again the Configuration steps will get finished for the Samples and Example of Product Configuration and then click on Finish.

Step19:
And then You can see the Installation has been completed successfully as shown in the below image.
It says Start MySQL Workbench after Setup and Start MySQL Shell after Setup.
So when you click on Finish button, you will be able to see MySQL Workbench and MySQL Shell also.

Step20:
Now you will be able to see the MySQL Shell and also the MySQL Workbench.
You can go to the Start windows menus and search Workbench you will be able to see and you can also see the MySQL Command-line Client and can do the practice.

This is MySQL Command-Line, which will ask the password at start, you entered the password which you set then click enter.

Now After entering password you are ready to use the MySQL and create database and perform all insert, update and delete queries.

New Posts related to MySQL DB queries are coming soon...😀
2 comments
Click here for commentsHelpful and easy understandable!
ReplyGreat efforts!.��sir
ReplyConversionConversion EmoticonEmoticon